Till yesterday I used eclipse when I wanted to work with the combination of Spring-web/Maven projects. To be more exact I was using STS which is a version of eclipse called Juno (if I’m not mistaken – but if I do – please correct me) that comes with the relevant plugins already installed (Spring and Maven’s jars for example) and it wears an ugly green skin. It also comes with vFabric server which is a web-container (like Tomcat) that was made by VMWare, which bought Spring in order to leverage Spring to push their products.
Now, if there’s an IDE that I hate – that’s Eclipse. It’s just so slow and buggy… You can spend a couple of hours on something that doesn’t work just to find out that if you create the project from scratch – everything’s peachy, and no, clean/re-built/restart/computer-restart wouldn’t have fixed it…
If IntelliJ wasn’t an option I would definitely choose Netbeans which is the fastest Java IDE I’ve experienced, but intelliJ is a tool you fall in love with…
So yesterday I decided that I’ve had it, and that I’m migrating my Spring projects to IntelliJ. In case you have an existing Maven project – it’s really easy to import and start working, but then I tried setting up a project from scratch, and after fighting with it for a couple of days I finally found out how to do it (by the way, I read a few other posts in regards which didn’t help…). I know, it should be easier and that’s a couple of black-points to JetBrains, but the effort was worthy!
In order that you won’t have to go through the same painful experience which I did, here’s a short guide on how to set up a Spring Web environment on IntelliJ. So without a further adu:
1. create a new project from scratch

2. select “Maven module” as a type and click “Next” after filling out the project name and path

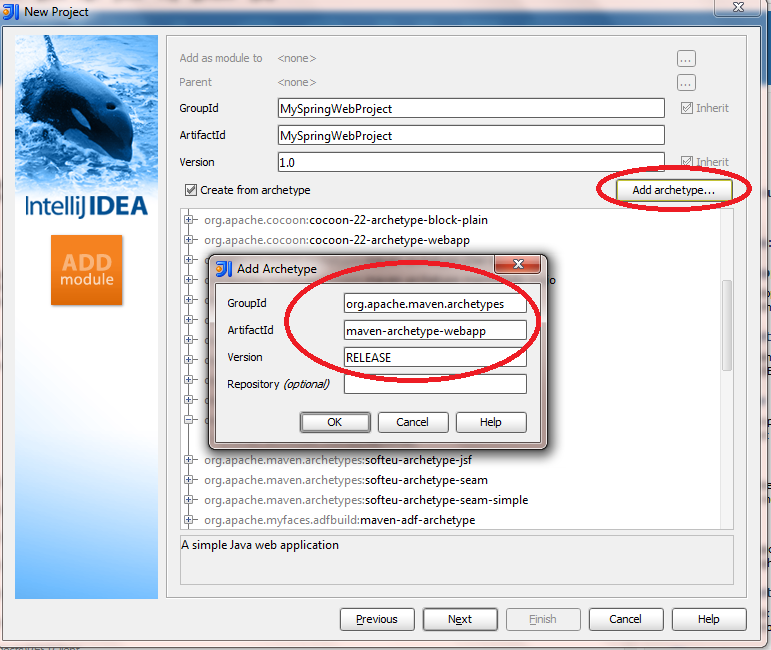
3. check the option “create from archetype” and choose “maven-archetype-webapp” from under “org.apache.maven.archetypes”. If you don’t have that option go to step 4, otherwise you can skip it and go directly to step 5.

4. In case we didn’t have the archetype, we’ll click on “add archetype” and add it manually as follows:
GroupId: org.apache.maven.archetypes
ArtifactId: maven-archetype-webapp
version: RELEASE
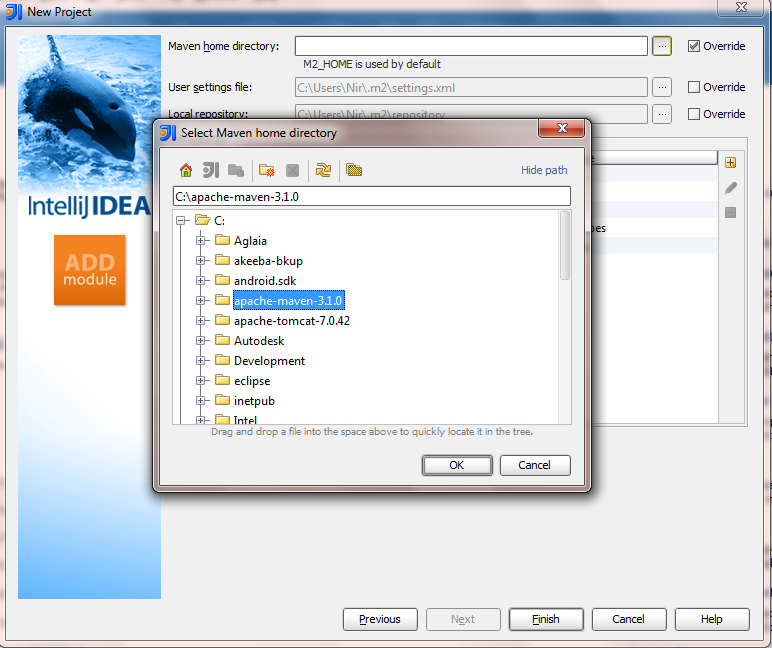
5. before you click on “Finish” check if the parameter M2_HOME is defined, if not, you can define it as an environment variable, or alternatively you can set it up right here:
6. once you click “Finish” a pom.xml file will be generated and some, other stuff will run on your screen, you should also see the following option to enable auto-import for Maven projects – click it!

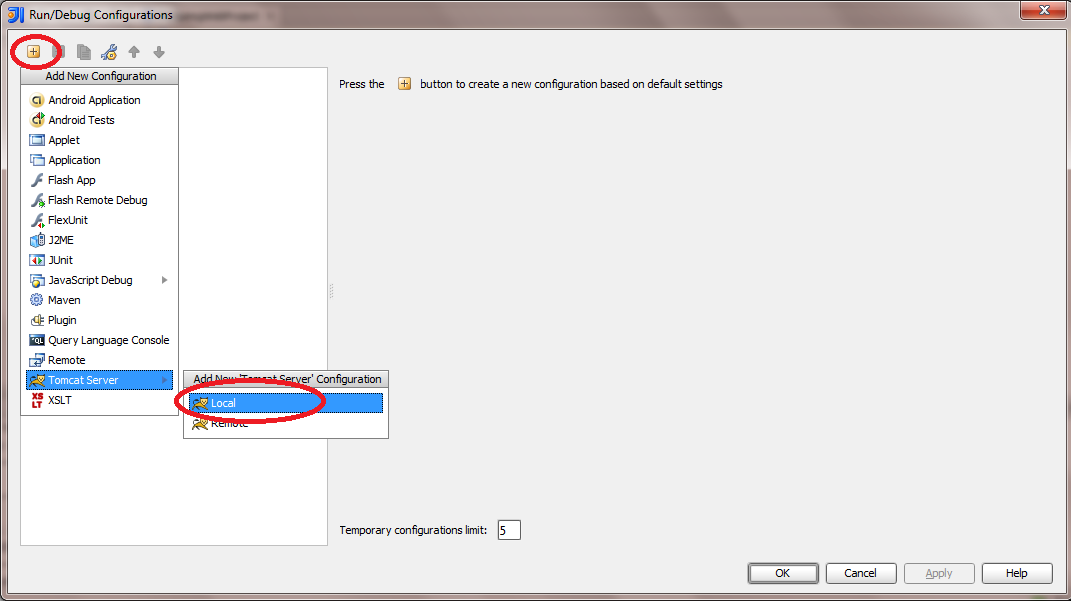
7. goto “edit configurations”, click on the “+” button and choose the local version of Tomcat

8. Name your server, check the option to “Build artifacts” and click on the “…” right next to it. Choose the .war file and continue

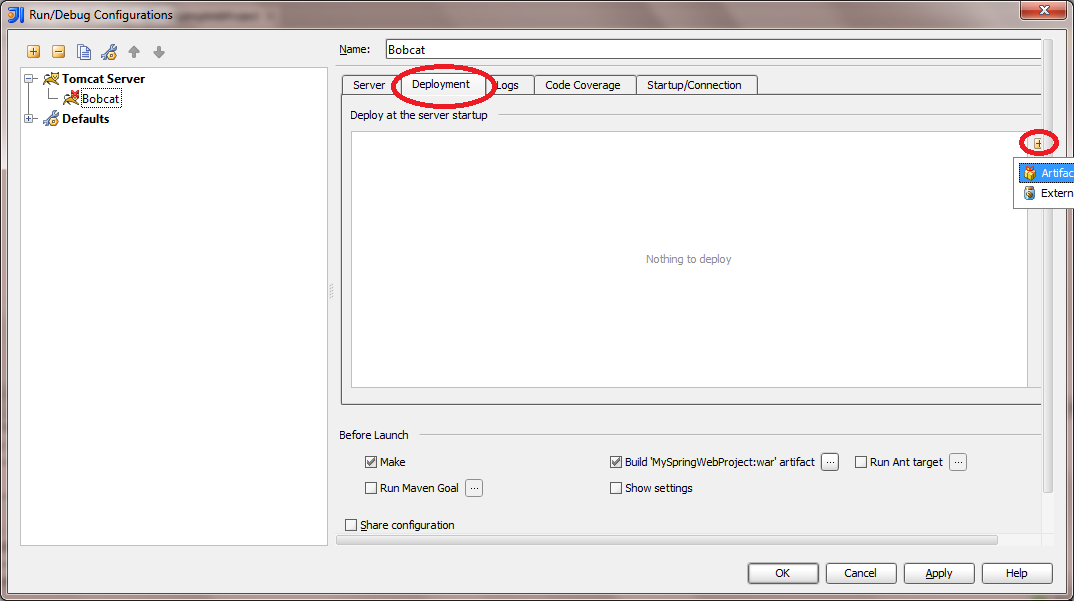
9. go to the “deployment” tab and click the “+” button to add an Artifact. Again, choose the war file

10. That’s it – we’re done! If you’ll expend your project you should be able to see something like the following screenshot.
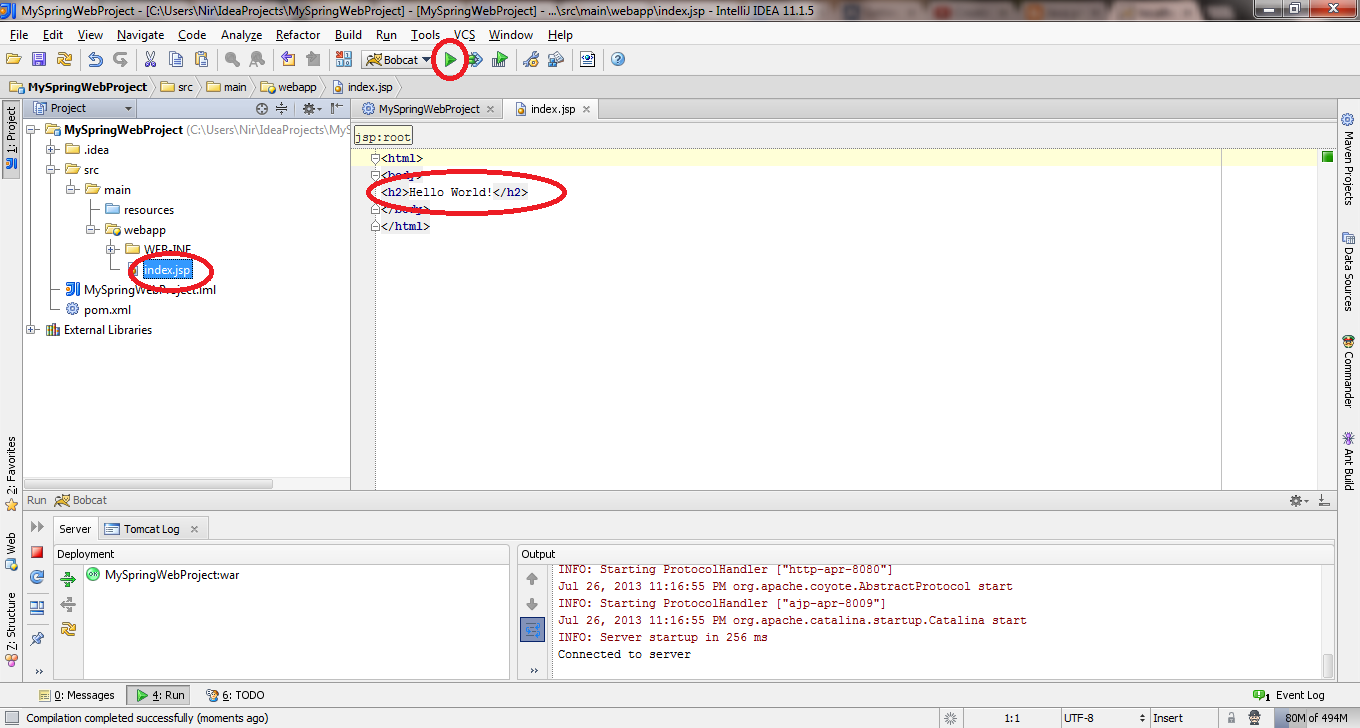
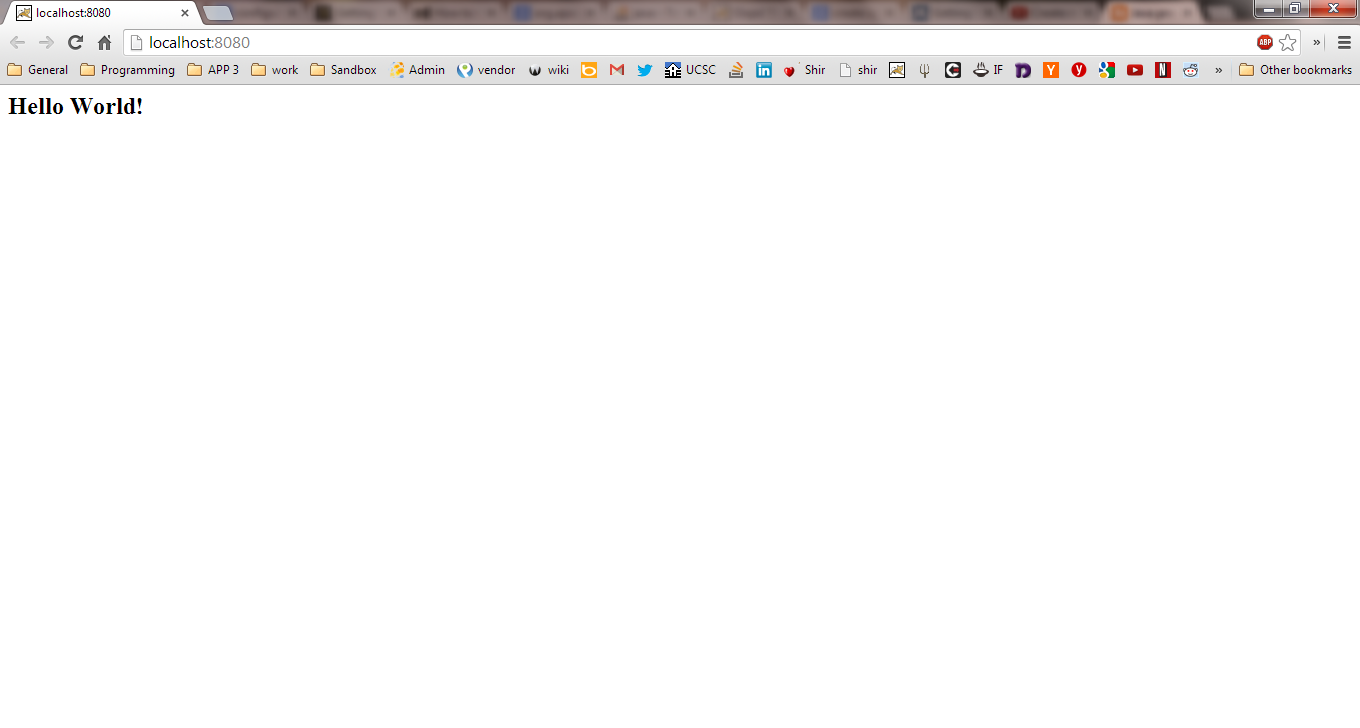
Click the green “Play” button and after Tomcat starts, you should be able to view “Hello World” jsp version on localhost